Then I went a step further and added in my own touches using the following Stampin' Up! paper punches:
Scallop Circle Punch, item #109043
5-Petal Flower Punch, item #109041
Boho Blossoms Punch, item #110711
I'm going to show you how I made my flower first. The video for the Starburst will be at the end of this blog entry. Remember if you are reading this via e-mail, you will only be able to see the video from my blog .. it doesn't show in the e-mail itself.
 Here's my completed flower, shown above. I've layered 5 designs and a brad to create it.
 The white piece is actually the scallop done with printer paper in my video tutorial. Figured I might as well use it since it was the right shape, color. Here's my paper punches and all of the shapes punched out. Use any color combination you would like. There is no right or wrong choices.
 Step 1: Layer the Starburst onto the white scallop circle using SNAIL adhesive.
 Step 2: Now layer the 5-Petal Flower on top of that using SNAIL adhesive.
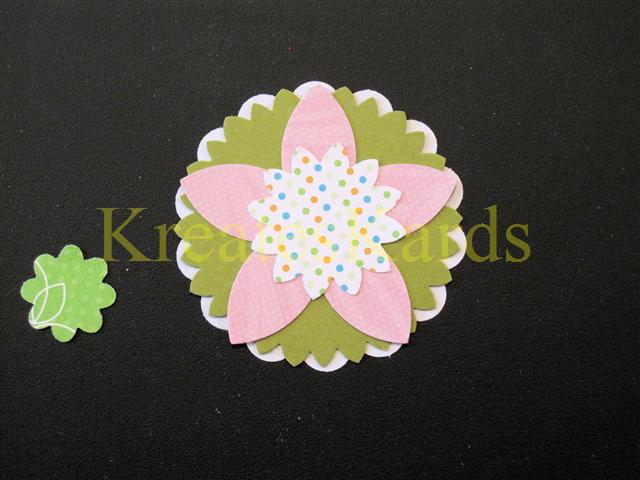 Step 3: Layer the largest of the Boho Blossoms on top of the 5-Petal Flower using SNAIL adhesive.
 Step 4: Layer the smallest of the Boho Blossoms on next using SNAIL adhesive.
 Step 5: Using the Mat Pack and a Paper Piercer, poke a hole into the middle of the flower. Be sure to go thru to the hard base of the Mat Pack. Keep flowers, together and poke in the brad you want to use to accent the flower.
 Here's your flower completed. Think of all of the variations you can do just by changing out the colors on the paper. If you do not want white as your base, punch out a scallop circle in the color of choice.
Take a moment to watch the video too. You are going to love how easy it is to make the Starburst using the Scallop Circle Punch.
If you have any questions or would like to place a Stampin' Up! order, please contact me directly (e-mail link is at top of this page) or go to my Stampin' Up! on-line store by clicking HERE.
Have a wonderful weekend. It will be very special with Mothers' Day on Sunday.
Mary
http://marydirector.stampinup.net/
Stampin' Up! -- Discover Your Creativity
(On-line ordering now available thru my website)

2 comments:
this is so cute thanks for sharing
What a great way to expand the use of this punch! Very fun, thanks!
Post a Comment