Subscribe via email

Enter your email address:

Delivered by FeedBurner

Showing posts with label Monday Inspiration. Show all posts

Monday, October 4, 2010

Monday Inspiration: How to Emboss Faux Metal

Did you know that you can buy contact paper that is faux metal? The photos on the packaging even show that it can be used to cover the front of a dishwasher to look like stainless steel. I just had to do a video to show you how to create this fabulous look for your cards and your scrapbooks. You are going to love it, I'm sure. I would again like to thank Sharon Field for posting a card using this technique on her blog.

The Faux Metal contact paper is made by Duck. It is 20" wide and 4 feet long. Contact paper has adhesive on the back which is why there is a protective cover on the back. Since contact paper curls easily, it is best to adhere it to a piece of card stock before working with it. This will flatten out the contact paper. You can use your BigZ dies and embossing folders from Stampin' Up!. Wait till you see the results. They are GREAT.

Ok, here's the video on how to emboss faux metal .. if you are reading this via e-mail you will need to come to my blog to view the video.


In the video when I am using the Top Note die, I tell you to put the paper upside down on the die. The best way to remember is to put the shiny side down...shiny side against the die.

Stampin' Up! Products Used:
Big Shot Die-Cutting Machine, item #113439
BigZ Top Note Die (Stampin' Up! Exclusive), item #113463
Textured Impressions Embossing Folder Northern Flurry (Stampin' Up! Exclusive), item #120902

Thank you for stopping by my blog today. Always appreciated.

Mary Director
http://marydirector.stampinup.net
Stampin' Up! -- Discover Your Creativity
(On-line ordering now available thru my website)

Monday, September 27, 2010

Monday Inspiration: Fraying Ribbon Tutorial

Welcome Back to Monday Inspiration. Today I want to show how to fray ribbon. I saw this on another website, but neglected to bookmark it to give the proper credit to the person I learned it from.

Look closely at the card below. On the right side you will see a frayed edge. This edge can be as narrow or as wide as you want it.


Some of the Stampin' Up! products in this card are:
Newsprint Designer Series Paper, item #117166
Extreme Dirt Bike Stamp Set, item #115175 - wood only
Teeny Tiny Wishes Stamp Set, item #115370 - wood only
1 1/4" Striped Grosgrain Ribbon Basic Black, item #115615

I thought it would be fun to mix the old newspaper that had the old style bicycle with the new Extreme Dirt Biker.

Tutorial of how to fray ribbon:

Measure the area to want to cover with ribbon, then add on 3/4" to 1 " to allow for wrapping to the backside of the card stock. This will help prevent the ends from fraying.


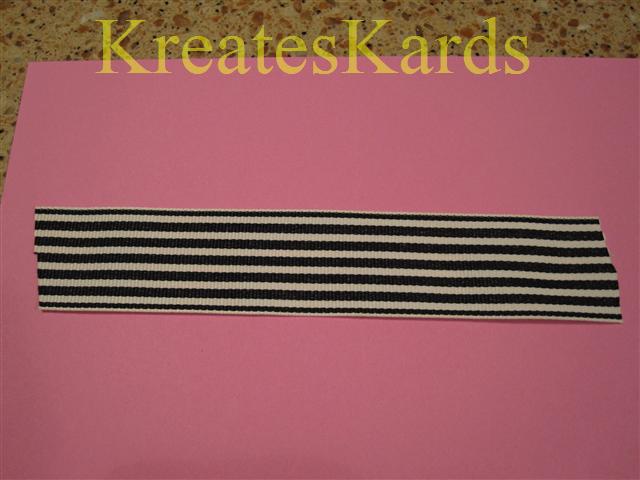
The striped ribbon is perfect for the fraying technique. Cut it in half using the center stripe as your guideline. Stampin' Up! Scissors and Paper Snips are the perfect tools for doing this.

Start at one end of the ribbon and pull the threads away. Be gently and go slowly.


You will be amazed at all the threads you will be pulling off. Pull as much as you want off. The width of the fringe/frayed area is up to you.


Looking at the frayed piece and the regular piece.

Close-up of the frayed area.

To adhere to a card, use Stampin' Up! sticky tape, item #104294.

We have this ribbon in 11 colors. You will find it on Page 191 of the Stampin' Up! Idea Book & Catalog 2010-2011. It is 10 yards for $9.95. Here is the list of the other available colors:

Daffodil Delight, item #119770
Pumpkin Pie, item #115616
Pretty in Pink, item #119775
Real Red, item #119768
Rich Razzleberry, item #119774
Night of Navy, item #119773
Marina Mist, item #119772
Certainly Celery, item #119771
Old Olive, item #115618
Early Espresso, item #119961
Basic Black, item #115615

Here are some more samples using the 1 1/4" Striped Grosgrain Ribbon in Basic Black, item #115615.

This is one of our favorite sayings. Thought it was perfect with the rocking chair on the card. The frayed ribbon is at the bottom of the card.


I used the ribbon on this card without fraying it.
Extreme Guitar Stamp set, item #115328 - wood only


Just having fun with our bat paper punch and the ribbon. Could be used for a Halloween card or just to let someone know you care.

Bitty Bat Large Paper Punch, item #119279

Hope you enjoyed the tutorial and the card samples today. If you would like to purchase any of the products above or other Stampin' Up! products, you may do so on-line by clicking HERE and then click on shop now. Also orders may be placed by contacting me directly (e-mail link is at the top of this page).

Mary Director
http://marydirector.stampinup.net
Stampin' Up! -- Discover Your Creativity
(On-line ordering now available thru my website)

Monday, August 30, 2010

Monday Inspiration: Simple yet Elegant

I wanted to share a card with you today for Monday Inspiration that was made by Karen Worrell. Karen is Stampin' Up! Demonstrator in NY and is part of my team. We just started doing card swaps once a month, and this is Karen's creation for this month. Here's more information about her beautiful card:

Stampin' Up! Products Karen used:

Old Olive Card Stock, item #100702
Designer Series Paper (DSP) - Brights Collection, item #117155
SNAIL Adhesive, item #104332
Fabulous Phrases, item #120501
Border Punch - Pinking Hearts, item #117649
Whisper White Grosgrain Ribbon, item #109025
Whisper White Craft Ink, item #101731

Don't you just love how the DSP and the Old Olive card stock are a perfect match for each other. Stampin' Up! does such a fantastic job on matching our products and color coordinating them too (some are not exact matches but blend together beautifully).

I hope Karen's card will inspire you to try a card like this too.

Only two days left for the summer mini catalog ... don't forget to place your orders NOW. You definitely don't want to miss out on the great products in this catalog. Orders may be placed 24/7 thru my Stampin' Up! website, CLICK HERE then click on Shop Now or you can contact me directly .. e-mail link is above in the header.

Mary Director
http://marydirector.stampinup.net
Stampin' Up! -- Discover Your Creativity
(On-line ordering now available thru my website)

Monday, August 23, 2010

Monday Inspiration: Tablets and Notebook Gift Ideas

I'm really enjoying altering all of the tablets and notebooks. Amazed too at how easy it is to do. You will find more details HERE how how to do this. Here's what I made this weekend. I'm hoping it will inspire you to make one too.

These are small tablets that I purchased. They would easily fit into a purse or backpack. The Owl in the birdcage was made with our new Stamp Set called Aviary, item #116956 - Wood OR #120462 - Clear Mount.

The scallop layers were created using 2 3/8" Scallop Circle Extra-Large paper punch, item #118874 AND 1 3/4" Scallop Circle paper punch, item #119854. I accented it with our new Jewels ... Basic Rhinestones, item 119246 which has 150 pieces in the package (50 each of 3 different sizes).

SNEAK PEEK Alert ... the blue borders on the Bird Cage tablet were done using the BigZ XL Die called Tasteful Trim, item #120893. It has 4 designs for trim/borders PLUS the "negative" of the cut-outs makes great designs too. In fact, the blue border above is using the negative of the zig zag border. Nothing is wasted on this cut-out/paper use.

NOTE: SNEAK PEEK items are not available for purchase until September 1st, 2010.


More fun with the Tasteful Trim die for the Big Shot that I mentioned above and accented with our rhinestone jewels.

Isn't the crayon box and covered tiny bond notebook perfect for a child! I found the box of 4 crayons at our local party store over by the treat bag items. There were all kinds of things to fill a party treat bag with. I adhered the crayon box to the cover using Sticky Strip, item #104294. Sticky Strip is the perfect adhesive for this as you need something extremely strong because of the weight of the crayons.


This is a customized gift that I made for a dear friend. This paper is part of the Designer Series Paper called Travel Journal, item #117156. It will only be available thru the end of the month as it is in our Summer Mini Catalog.

The small cruise ship was stamped and cut out, then glued to the cover. The image is from Sentimental Journey, item #118513 - Wood OR item #120075 - Clear Mount. It is a great coordinating item for the Travel Journal Paper mentioned above. It also is only available thru the end of the month. To view the complete stamp set, click HERE.

If you want either the paper or the stamp set, you need to order now. Don't wait till the last minute and miss out.

Close up of the cruise ship stamped image.


Initials were stamped using Lovely Letters Alphabet stamp set (double mounted), item #115030 - wood only.

UPDATED: 8/23/2010 .. pm 2 new photos added

Same paper, same stamp sets .. but this time I used our 2 sizes of Tag paper punches and brads to accent the Initials:

Large Tag Paper Punch, item #119876
Extra Large Tag Paper Punch, item #119866
Metallic Brads, item #119741

Ordering on-line 24/7 available on my Stampin' Up! website by clicking HERE, then clicking on shop now or you can contact me directly.

Mary
http://marydirector.stampinup.net
Stampin' Up! -- Discover Your Creativity
(On-line ordering now available thru my website)

Monday, August 16, 2010

Monday Inspiration: Team Card Swap

We had a team meeting here last Thursday night. It is the first time we have done a card swap. Each person that wanted to participate made a card front of any design that they wanted. The only requirement was that it be made with Stampin' Up! products (logical since we are all Stampin' Up! Demonstrators).

It was fun to see what each person had made, and it will be a great way to share new ideas. We are going to be doing the card swap monthly. I have two more I will post later this week. They are coming long distance, and one of them hasn't arrived yet.

Not everyone put their name or list of supplies on the card front, so I will put in what I have. This way at least you can see the beautiful cards and have them for inspiration.


#1 Created by Sarah Widdison
Stamp Set use for birds & cage: Aviary item #116956 - Wood OR #120462 - Clear Mount


#2 Created by Mary Terlizzi (Original Design by Mary Fish).


#3 Created by Mary Director
My Digital Studio, item #118108
Summertime Splendor DSP, item #121067 (digital download)
Love What You Do Stampbrush, item #123597 (digital download)


#4 Created by Marcia Edman
Stamps Sets Used:
Elizabeth, item #117120 (wood only)
Short & Sweet, item #115060 (wood only)


#5 Created by Judy Gielniak
Stamp Set Used: Friends Never Fade, item #118750 - wood OR #120618 - clear mount
Jumbo Wheel Used: Very Vintage, item #117693


#6 Created by Julie Kahsin
Stamp set used: Curly Cute, item #117014 - Wood OR #120510 - Clear Mount


#7 Sneak Peek Created By Peggy Jones
Stamp set used will NOT be available until 1 September:
.....Paisley Prints, item #120817 - Wood OR #121121 - Clear Mount


#8 Created by Leigh O'Connor
Stamp set used: Christ is Born, item #111612 - Wood Only


#9 Created by Melinda Ridgway
Stamp sets used:
Curly Cute, item #117014 - Wood OR #120510 - Clear Mount
Printed Petals, item #116679 - Wood OR #120444 - Clear Mount

Really some terrific cards. Hope they will inspire you to be creative this week and create some of your own. I will post more photos later in the week.

If you need any Stampin' Up! products, you may order 24/7 directly tho my website by CLICKING HERE then click on Shop Now. You may also contact me directly by clicking on the E-mail Me in the header to this blog.

Mary
http://marydirector.stampinup.net
Stampin' Up! -- Discover Your Creativity
(On-line ordering now available thru my website)

Monday, August 9, 2010

Monday Inspiration: Quick Accents - Nursery Suite

As we discussed the other day HERE on my blog, Quick Accents is a great Stampin' Up! product that will make last minute cards and scrapbooks a snap. The Nursery Suite Quick Accents it item #118709. Altho it is a baby/child/nursery theme much of the contents could be used for anyone. I wanted to show you a couple of samples that I made this morning.

The white border with brown trim is actually the "negative/throw away" part for the border on the next card. I thought it looked great and since it has adhesive on it too went ahead and used it. The scallop circle and the cupcake circle are two separate die cuts that I layered together. Stamped on an imagine using Early Espresso Classic Ink, signed the back of the card, and the card was finished.


This card used one of the borders on the 2nd sheet in the package. Then I layered the scallop circle and the sentiment circle placing them on the center of my card. Sentiment says "dream of possibilities". I signed the back of the card, and the card is complete.

For both of the card bases I used So Saffron card stock. It's funny, I had avoided this color for 2 years and had never purchased it before. A customer asked about it, so I made sure I had the card stock, the classic ink, and the Stampin' Write Marker. I love this color. Wonder why I never bought it before !!!! LOL Everyone I have shown the color too remarks how much they like it too.

Ordering Stampin' Up! products on-line is quick and easy by going to my website and then clicking on shop now. You may also contact me directly, my e-mail link is in the blog header.

Mary
http://marydirector.stampinup.net
Stampin' Up! -- Discover Your Creativity
(On-line ordering now available thru my website)

Monday, August 2, 2010

Monday Inspiration: One Stamp, Three Looks


The Elements of Style Stamp Set has been a big hit with Stampin' Up! customers. The image below is the main image in the set, but there is also a hummingbird, a decorative swirl, "Life is a matter of moments" and "for you" for a total of 5 stamps.

Elements of Style Stamp Set, item #118611 - wood mount OR #120045 - clear mount, set of 5

I stamped out 3 images using Early Espresso Classic Ink, item #119670 on Whisper White Card Stock. This worked well since I was using Stampin' Pastels (chalk) - item #120962, Watercolor Pencils - item #101879, Stampin' Write Markers - item #119806 (can be purchased individually too) and other classic inks to achieve my design looks. I used the Watercolor Pencils alone without water. Had I wanted to do watercoloring, it would be important to use a waterproof ink and watercolor paper.

Watercolor Paper, item #105019
Basic Black Classic Ink, item#101179. waterproof ink
Basic Gray Classic Ink, item #109120, waterproof ink
StazOn Jet Black Ink, item #101406, permanent ink
StazOn, White In, item #106960, permanent ink

This card was created using sponge daubers and Stampin' Pastels. I randomly daubed color all over the card front.


The 2nd card was created by sponging on color all over the card, then on the edges to give it a bordered affect. I then used Stampin' Write Markers to accent the leaves and flowers.


The final card was created using the Watercolor Pencils (without water, just the pencil).

It is amazing the different looks you can achieve just by changing out how you add color to them. Hope you will try this too. There's a world of possibilities waiting for you.

If you would like to purchase any of these products, just stop by my on-line Stampin' Up! store by clicking here, then click shop now. You can order on-line 24/7.

Mary
http://marydirector.stampinup.net
Stampin' Up! -- Discover Your Creativity
(On-line ordering now available thru my website)

Monday, July 26, 2010

Monday Inspiration: Post-It Note Tutorial

First I would like to thank Angie Juda for her inspiration. She had a similar project on her blog last week. It was just so cute I had to try it too.

This post-it note holder is a perfect stocking stuffer, small gift item, a thank-you, or just something nice to have in your purse or by the phone for notes.

Stampin' Up! Items Used:
Stamp Set: Friends Never Fade, item #118750 - wood OR #120618 - clear mount
Craft Stampin Pad, item #101731
Poppy Parade Card Stock, item #119793 ... piece is 3 3/8" x 8 1/2" AND a 3" square
Whisper White Card Stock, item #100730 .. piece 3" square
1/2" Stitched-Poly ribbon, item #119263 ... piece is 15" long
Jumbo Brad, Neutrals, item #112533 ... use 1 Whisper white
Uni-Ball Signo Gel Pen, White, item #105021
Sticky Strip, Item #104294 (this is double sided tape)
SNAIL Adhesive, item #104332 (refills are #104331)
Stampin' Dimensionals, item #104430
Crimper, item #101618
Paper Piercing Tool, item #116631
Mat Pack, item #105826
1 3/4" Scallop Circle Extra-Large, item #119854
1 3/8" Circle Large, item #119860
Bone Folder, item #102300
Grid Paper, item #102787 (love this to protect my work surfaces, great to test stamp image on too -- 100 sheets for only $9.95)

All items listed above are available for sale thru my Stampin' Up! Website, CLICK HERE, then click on Shop Now to purchase.

Isn't the Poppy Parade card stock absolutely gorgeous!!! I love it and the ribbon is a perfect match for it too.

Craft ink in Whisper White is perfect for stamping on darker colors. Craft ink can take up to an hour to dry, so don't handle it after stamping unless you are certain it has dried completely.

I use the Grid Paper all the time and decided tonight that I should give you all a bit more information on it. There are 100 sheets in the package for $9.95. It is an oversized pad of lined grid paper to protect your stamping surface. It serves as scratch paper and ruler plus makes clean-up so easy. Includes a standard card dimension list and space for a writing a wish list. Grid is 10" x 16". Not only do I use them at my classes for each work surface, I use them myself when I am working on projects too. It is a must have item for me, and I highly recommend it.

Cut Poppy Parade Card Stock at 3 3/8" x 8 1/2"
Score at 4 1/4" and fold crisply with a bone folder.


Stamp image randomly over the complete piece of card stock using Whisper White Craft Ink. Set this aside. It will take approximately one hour to completely dry.


Using the small Whisper White square, punch out 1 scallop circle.


Now punch out the 1 3/8 circle in Poppy Parade.
Using SNAIL adhesive, adhere them together.


When you use the Uni-Ball Signo Gel Pen, hold the pen upright not tilted and do not apply a great deal of pressure to the point. The less pressure the better the flow of ink. Pen should be store point side down to keep the tip moist.

Using the gel pen, make little stitch marks around the Poppy Red Circle. It will take a minute or two to dry.


Using the Mat Pack and the Paper Piercer Tool, pierce a hole in the very center of the Poppy Parade Circle. Then gently push the jumbo brad thru and open the prongs on the back.

When I pierced the paper, I twisted the pierce in a circular motion to make the hole a tad larger to accommodate the prongs on the tab.


Now without putting pressure on the handle, position the folded part of the paper in the crimper. See how it is just at the points.

Now squeeze the handle and crank thru. If the crimping barely shows, repeat this step. No need tho to do more than twice.

Photo of the crimped end.
I used a 1/2 pad of post-it notes that are 3" x 3".
On the back place 3 strips of Sticky Strip.
Remove film and center from the crimped lower edge to the lower edge of the cover.
Press firmly in place.

Photo of placement of the post-it note pad.

I put about a 1" strip of adhesive (you could use sticky strip too) on the ribbon in the center.
Then I place the back crimped side down onto the ribbon. This will help lock it into place and keep it stable.

Bring the ribbon around to the front and tie a knot bow.
Using Stampin' Dimensionals, adhere the scallop circle piece to the front of the cover.

Here's 3 that I made the last few days. The one on the bottom is Concord Crush. All the In Colors have this great matching ribbon. It is so soft and easy to tie but is not flimsy at all.

Hope you will try making these too.

Stampin' Up! supplies are available on-line 24/7 thru my website. CLICK HERE then click on shop now to place your order. You can also contact me directly by clicking on the E-Mail me in the blog header.

Mary
http://marydirector.stampinup.net
Stampin' Up! -- Discover Your Creativity
(On-line ordering now available thru my website)

Monday, July 19, 2010

Monday Inspiration: Secret Fold Card

Altho I made the card, the card design came from "Stamp and Scrap with Frenchie". Check out her blog for a great video on how to create this card. The color inspiration is a request from Dawn Rose who asked to be WOW'd with Basic Gray, Melon Mambo, and Old Olive. This was the first time I've used Basic Gray.

Above is the front of the card. It is a gate fold card that will fit in an A2 envelope. The flap is held in place with one of our buttons attached with a dimensional. On Frenchie's card, she used a belly band on one and a circle in the corner for another. All of them will work.

This is the inside you see when you first open the card.


This is the Secret Fold that opens the card even more.

This is what the secret/hidden inside looks like.

If you like this card, you should also like the Never Ending Card. You can find it HERE on my blog with directions.

Stampin' Up! products used:
Basic Gray Card Stock, item #121044
Melon Mambo Card Stock, item #115320
Old Olive Card Stock, item #100702
Fox & Friends Stamp Set, item #117020 -wood mount OR item #118565 - clear mount
Designer Buttons, Brights, item #119747
Stampin' Dimensionals, item #104430

Ordering products is as easy as CLICKING HERE then click on shop now. By going thru my on-line website, you may order any time day or night. Also you may contact me directly to place your order.

Stampin' Up! has great, quality products.

Mary
http://marydirector.stampinup.net
Stampin' Up! -- Discover Your Creativity
(On-line ordering now available thru my website)

You May Also Like:

Blog Widget by LinkWithin