Subscribe via email

Enter your email address:

Delivered by FeedBurner

Thursday, September 30, 2010

Stampin' Up! Convention 2010 Highlight Video - 2nd post today


Personally I have not been to convention yet, however I am hoping to go with many, if not all, of my team members next summer. It is an amazing event filled with excitement, fun, and inspiration. Stampin' Up! posted this video, and I just had to share it with all of you. The song is the theme song for the 2010 convention. It can be a bit loud, you might want to turn the volume down.


Only demonstrators can go to the Stampin' Up! Convention. Doesn't it look like lots of fun and excitement!!!! Sign up as a Stampin' Up! Demonstrator, so you can start planning to go too.

Right now we are offering a very special opportunity to new recruits. Not only do new recruits receive their starter kit filled with over $310 worth of Stampin' Up! products for only $175 plus tax (Free shipping), but those that join between now and October 18th ALSO will receive a beauty craft tote. CLICK HERE to learn more about it. Also if you contact me directly (e-mail link at top of the page here), I will be happy to send you information about becoming a demonstrator and part of my team "KreatesKards".

Stampin' Up! has the best quality products. Even when times are tough, people are still crafting. Making cards, scrapbooking just to name a few things that are a great way to bring the family together and spend quality time together. Stampin' Up! also realizes that many do not want to do this as a business. Stampin' Up! allows people to sign up as hobby demonstrators too just to get the discount on the products you use and love. My team "KreatesKards" is a mix of hobby and business demonstrators. We are having so much fun, and it would be awesome if some of you join our team too. There is always room on my team, so feel free to contact me if interested.

Be sure to scroll down to see my earlier post today too.

Mary Director
http://marydirector.stampinup.net
Stampin' Up! -- Discover Your Creativity
(On-line ordering now available thru my website)

Stampin' Up! Happy Together Stamp Set

After creating a video the other day for my blog, I realized that I had these cute little birds. How could I toss them and not put them on a card. Above is the card I made. Thought it was cute. The cards has lots of layering giving is a great deal of dimension and contrast.

Stampin' Up! Stamp Set:
Happy Together Stamp Set, item #114314 - wood only

Help support my blog, by purchasing your Stampin' Up! product through me and my on-line store. Just CLICK HERE, then click on shop now. Stampin' Up! products can be order 24/7.

Mary Director
http://marydirector.stampinup.net
Stampin' Up! -- Discover Your Creativity
(On-line ordering now available thru my website)

Wednesday, September 29, 2010

Stampin' Up! Updates & Announcements

These were posted to the Stampin' Up! Demonstrator Website today. I wanted to be sure to pass the information so you were aware of what was happening.

September 29, 2010

Watercolor Wonder Crayons are still currently unavailable for purchase. As we mentioned in a previous current update, our supplier was purchased by another company, which resulted in their relocation to a new manufacturing facility in a different country with a new staff. Because of these extraordinary circumstances, we are experiencing more difficulties than we anticipated, and we still do not know when Watercolor Wonder Crayons will be available for purchase.

We are currently working with the CEO of the company to resolve this problem as quickly as possible. We will keep you updated as we receive information from the supplier.

***********************
September 29, 2010

Please note the following product updates:

The Candy Cane Rub-Ons (item 120990) are now available to order.

The following items are experiencing quality issues and are currently unavailable to order:

118073: Fancy Flower Punch
120906: 2-1/2" Circle Punch

We will give you more information when it becomes available.

Mary Director
http://marydirector.stampinup.net
Stampin' Up! -- Discover Your Creativity
(On-line ordering now available thru my website)

Back to Basics: How to use a Bone Folder & ATG

In my classes that I teach, one of the things I stress over and over is the use of the Bone Folder to obtain crisp, clean fold for your card bases and projects. This product is a "must have" in my opinion.

Bone Folder, item #102300

Normally on my blog, I stick totally to Stampin' Up! products. A customer was having major issues with her ATG and lived in another state so it was impossible to give her a complete description of how to use her ATG properly. The best way to explain this was to do a video. I incorporated the bone folder tutorial with the ATG one. Here's the video .. if you are reading this via e-mail, please come to my blog to view the video.


Thank you for viewing my blog. I love being a Stampin' Up! Demonstrator. If you have any questions, please let me know.

Mary Director
http://marydirector.stampinup.net
Stampin' Up! -- Discover Your Creativity
(On-line ordering now available thru my website)
Tuesday, September 28, 2010

Back to Basics: How to Ink Your Stamps & Stamping Tips

Back to Basics: How to Ink Your Stamps & Stamping Tips whether using a stamp pad or a Stampin' Write Marker.

If you are reading this via your e-mail, you will need to come to my blog to watch the video.


Stampin' Up! Products Used:
Happy Together Stamp Set, item #114314 - wood only
Classic Stampin' Pad Pacific Point, item #111837
Stampin' Write Marker Pacific Point, item #120968

If you would like to place your Stampin' Up! Order now, please click here then click on shop now.

Mary Director
http://marydirector.stampinup.net
Stampin' Up! -- Discover Your Creativity
(On-line ordering now available thru my website)

Monday, September 27, 2010

Monday Inspiration: Fraying Ribbon Tutorial

Welcome Back to Monday Inspiration. Today I want to show how to fray ribbon. I saw this on another website, but neglected to bookmark it to give the proper credit to the person I learned it from.

Look closely at the card below. On the right side you will see a frayed edge. This edge can be as narrow or as wide as you want it.


Some of the Stampin' Up! products in this card are:
Newsprint Designer Series Paper, item #117166
Extreme Dirt Bike Stamp Set, item #115175 - wood only
Teeny Tiny Wishes Stamp Set, item #115370 - wood only
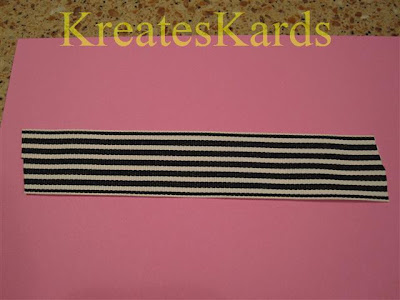
1 1/4" Striped Grosgrain Ribbon Basic Black, item #115615

I thought it would be fun to mix the old newspaper that had the old style bicycle with the new Extreme Dirt Biker.

Tutorial of how to fray ribbon:

Measure the area to want to cover with ribbon, then add on 3/4" to 1 " to allow for wrapping to the backside of the card stock. This will help prevent the ends from fraying.


The striped ribbon is perfect for the fraying technique. Cut it in half using the center stripe as your guideline. Stampin' Up! Scissors and Paper Snips are the perfect tools for doing this.

Start at one end of the ribbon and pull the threads away. Be gently and go slowly.


You will be amazed at all the threads you will be pulling off. Pull as much as you want off. The width of the fringe/frayed area is up to you.


Looking at the frayed piece and the regular piece.

Close-up of the frayed area.

To adhere to a card, use Stampin' Up! sticky tape, item #104294.

We have this ribbon in 11 colors. You will find it on Page 191 of the Stampin' Up! Idea Book & Catalog 2010-2011. It is 10 yards for $9.95. Here is the list of the other available colors:

Daffodil Delight, item #119770
Pumpkin Pie, item #115616
Pretty in Pink, item #119775
Real Red, item #119768
Rich Razzleberry, item #119774
Night of Navy, item #119773
Marina Mist, item #119772
Certainly Celery, item #119771
Old Olive, item #115618
Early Espresso, item #119961
Basic Black, item #115615

Here are some more samples using the 1 1/4" Striped Grosgrain Ribbon in Basic Black, item #115615.

This is one of our favorite sayings. Thought it was perfect with the rocking chair on the card. The frayed ribbon is at the bottom of the card.


I used the ribbon on this card without fraying it.
Extreme Guitar Stamp set, item #115328 - wood only


Just having fun with our bat paper punch and the ribbon. Could be used for a Halloween card or just to let someone know you care.

Bitty Bat Large Paper Punch, item #119279

Hope you enjoyed the tutorial and the card samples today. If you would like to purchase any of the products above or other Stampin' Up! products, you may do so on-line by clicking HERE and then click on shop now. Also orders may be placed by contacting me directly (e-mail link is at the top of this page).

Mary Director
http://marydirector.stampinup.net
Stampin' Up! -- Discover Your Creativity
(On-line ordering now available thru my website)

Sunday, September 26, 2010

Holiday Cards Part 3 & Stampin' Up! Holiday Promotion

Just a few more holiday cards to share today. Again, some items used are retired. The cards tho will give you a layout idea to use and help you build your own cards whether using it for Christmas or other occasions.


Layering is easy to do and makes a great card layout.


This is "one stamp" used to create the whole image of the trees, the bird, and Season's Greetings. I used Stampin' Write Markers to color in the stamp and then stamped the image on the card stock. You don't need to stamp images in only one color when you ink the stamps with the brush tip side of the Stampin' Write Markers from Stampin' Up!.

When you use the Stampin' Write markers, it is easy to only ink specific areas on a stamp. Let's say on the stamp above I only wanted the trees. I would use my marker to color in/ink the trees then stamp it on the card stock. The bird and the greeting will not show as they were not inked.

When you use Stampin' Write Markers to ink the stamps ... when you are done inking HUFF on the stamp to add a bit of moisture, then stamp. The HUFF really does make a difference.

If you are planning to make your own holiday cards this year, now is a great time to order. Next month too, Stampin' Up! will be doing a Holiday Bundle promotion which will give you discounts on a number of our holiday items. These items listed below when purchased as a bundle will give you 20% off. This promotion is valid from: October 19th thru December 16th, 2010.

Stamp Set Bundles

Bundle Description

Wood-Mount Bundle Item

Wood-Mount Bundle
Sale Price

Clear-Mount Bundle Item

Clear-Mount Bundle
Sale Price

Vintage Christmas Card Bundle
  • Bells & Boughs Set
  • Deck the Halls Designer Series Paper

124067

$23.92

124068

$19.92

Contempo Christmas Card Bundle
  • Contempo Christmas Set
  • Jolly Holiday Designer Series Paper

124071

$20.72

124072

$17.52

Tags til Christmas Bundle
  • Tags til Christmas Set
  • Decorative Label Punch

124077

$38.32

124078

$31.92

Gift Packaging Bundle
  • Gifted Set
  • Mini Lunch Sacks

124083

$26.32

124084

$19.92

Simply Adorned Gift Bundle
  • Charming Set
  • Simply Adorned 1" x 1-1/4" Charm
  • Simply Adorned 24" Chain

124076

$39.88

---

---

Non-Stamp Set Bundle

Bundle Description

Bundle Item

Bundle Sale Price

Frame Gift Bundle
  • Definitely Decorative Chunky Frame
  • Small Chocolate Chip Dotted Flourish Décor Elements

124075

$19.92


Looking forward to answering any question you may have as you are making your holiday cards this year. Think of all the joy you will have making the cards, and the excitement each person who receives one will feel. Sending handmade cards truly expresses a part of you with each one you make and send to family and friends.

Ordering on-line is available on my Stampin' Up! website ... just CLICK HERE, then click on Shop Now to get started.

Mary Director
http://marydirector.stampinup.net
Stampin' Up! -- Discover Your Creativity
(On-line ordering now available thru my website)

Saturday, September 25, 2010

Holiday Cards Part 2

One of my favorite stamp sets in the Stampin' Up! Holiday Mini is the Jolly Bingo Bits, item #120857 - wood OR item #121187 - clear mount. It has 24 darling approximately 1" image stamps. We even have a Bingo Card Stamp Set, item #120851 - wood only to go with it.

I wanted to see the images on cards too, not just for a Bingo game. I am very pleased with the results and the little penguins won my heart big time. My mom LOVED penguins, so when I see them they make me smile and think of her too.

Jumbo Stampin' Wheel, item #120864 was used for the base of this card. I added in the small characters from the Jolly Bingo Bits (item numbers above) using dimensionals, item #104430.


The other day I did a video showcasing how to do the sponge technique. These were the leftover scallop circles and the penguins looked perfect on them. The Merry Christmas stamp is from Bells & Boughs (Stampin' Up! Holiday Mini), item #120831 - wood OR #12142 - clear mount.

Here's more penguins (I told you I loved them ... LOL). The reindeer is a single stamp that can be purchased thru Stampin' Up!. It is called Dasher, item #116816 - wood mount only. I used my Uni-Ball Signo Gel Pen, item #105021 to accent his antlers and to write out Merry Christmas.

NOTE: If you have the Uni-Ball Signo Gel Pen, be sure to store it pen point down so that the ink flows to the tip when not in use. If a pen doesn't seem to be working, make little circles on card stock and normally the ink will start flowing again. My theory is that the ink may thicken at the tip and the motion of the circles heats the tip from friction and allows it to flow again. You will also find that if you apply less pressure when using, the ink will flow smoother.

Thank you for being a follower of my blog. On-line ordering 24/7 HERE

Mary Director
http://marydirector.stampinup.net
Stampin' Up! -- Discover Your Creativity
(On-line ordering now available thru my website)

Friday, September 24, 2010

Holiday Cards Part 1

I've been busy making holiday cards the last few days. These cards will be sent overseas to a unit of soldiers so that they will have cards to send home to their friends and families. I have been participating in cards for soldiers now for over 2 years. It is a project I believe in and love to support.

I thought I would show you some of the photos of the cards. I hope that they will give you inspiration for your holiday cards too. Some stamps and card stock used are retired. But the card layout is one that could be easily recreated using other stamps and card stock that are current products for Stampin' Up!

Paper Daisies, item #119243 could be used in place of the silk flower.
Any of Stampin' Up!'s embossed folders would be great as the backdrop to the flower and ribbon.


Our ornament punch, item #119847 is perfect with DSP (Designer Series Paper) or with the stamp set called Delightful Decorations, item #116517. The ornament stamped images in this stamp set are perfect used with our ornament punch. The ornament above was stamped twice. I used a circle punch on one to cut out the floral/star image. Then attached that image to the full ornament using a dimensional to give it an upraised look.

This card is for Hanukkah. This stamp set is retired, however we do have one that is available called Shalom Sayings, item #111686. It is on the carry-over list so will not be in any of the catalogs but is available for purchase. If you would like to see the carry-over list, please click here for images, item numbers, and pricing. There are 4 sets on this list ... Happy Kwanza, For The Bride, Taking Care of Business, and Shalom Sayings.

If you have any questions or would like to place an order, you may contact me directly (e-mail link above) or you may order on-line 24/7 by clicking HERE and then click on shop now.

Thank you for following my blog.

Mary Director
http://marydirector.stampinup.net
Stampin' Up! -- Discover Your Creativity
(On-line ordering now available thru my website)

Thursday, September 23, 2010

Stampin' Up! Big Shot Die Cutting Machine

I spent much of last weekend making cards using my Stampin' Up! Big Shot Die-Cut Machine. I thought it would be fun to show them to you today with just a brief overview of each.


This scallop square card was made using the Big Shot Die-Cut Machine and the Scallop Square BigZ Clear Die (item #11590). You fold your card stock, then put it thru the Big Shot being sure the the fold is NOT all the way to the top of the die. That way you create the folded card with the scallops on 3 sides.

Bells & Boughs Stamp Set, item #120831 - wood OR item #121142 - clear mount

Watercolor pencils, item #101879 were used to color the design in.

This is one of my favorite cards I have made to date. I love how the crumb cake card stock sponged and stamped with Early Espresso Classic Ink has the look of leather. LOVE IT!

I used Jewels-Pearls, item #119247 to accent the card.

Frame, Oval Scallop, BigZ Die, item #114521.
I actually cut out two of these and glued them back to back on the gate fold card.

Here's the inside of the card, ready for a note.


Can you see what fun I was having with my Big Shot Die-Cut Machine ... item #113439. I used a number of the Embosslits Dies for this card:

Embosslits, Hi, item #115952
Embosslits, Simple Flower, item #114514
Embosslits, Cherry Blossom, item #114516
Embosslits, Flower Burst, item #114515

These beautifully layered flowers were also made with the Big Shot. I put them on card stock that I had misted in color using my Color-Spritzer Tool. There is a tutorial HERE on how to use it.

Flower, Daisies #2 BigZ die, item #114520

When you buy the Big Shot you receive the machine, standard cutting pads and the multi-purpose platform. Stampin' Up! has many exclusive items to use in your Big Shot.

Big Shot Die-Cutting Machine, item #113439 and resonably priced at $99.95. I highly recommend this machine. It makes card making, paper crafting, scrapbooking so much easier. The machine is light weight enough to take with you to a crop and is extremely well made. So easy to use too.

If you would like to buy one now, please go to my Stampin' Up! on-line store where you can order 24/7 or contact me directly. If you want to order on-line, click here then click on shop now.

Thank you for visiting my blog today.

Mary Director
http://marydirector.stampinup.net
Stampin' Up! -- Discover Your Creativity
(On-line ordering now available thru my website)

Wednesday, September 22, 2010

Back to Basics: How to do the Sponging Technique on Card Stock

Lovely as a Tree Stamp Set, item #115026 - wood only

Using the sponging technique on any card or punched out image can add such depth and dimension. In this video I show how you can do this sponging technique easily with our Stamping Sponges or Sponge Daubers.

Stamping Sponges, item #101610 (3 to a package)
Sponge Daubers, item #102892 (12 to a package)

I always cut my sponges into 6 pieces using my Paper Snips (scissors), item #103579. I wash both the sponges and the sponge daubers out with warm water and soap, rinse thoroughly and then air dry. If needed you can clean them with Stampin' Mist, item #102394 but not really necessary.

If you are reading this blog entry via e-mail, you will need to visit MY BLOG to view the video.


Thank you for visiting my blog today. I hope you enjoyed the video.

Mary Director
http://marydirector.stampinup.net
Stampin' Up! -- Discover Your Creativity
(On-line ordering now available thru my website)

Tuesday, September 21, 2010

Back to Basics: How to Re-Ink Your Stampin" Up! Stamp Pads

Any time I buy a Stampin' Up! Ink Pad, I immediately buy the refill bottle too. Here's my latest video showing you how to re-ink your Stampin' Up! stamp pads.

If you are reading via e-mail ... please come to my blog to view the video.


I hope you are enjoying my Back to Basics videos. If you have any questions, please let me know. Also just a reminder that you can order 24/7 using my Stampin' Up! website ... CLICK HERE then click on shop now.


Mary Director
http://marydirector.stampinup.net
Stampin' Up! -- Discover Your Creativity
(On-line ordering now available thru my website)

Monday, September 20, 2010

Back to Basics: How to Open Your Stampin' Up! Ink Pads

I have many new customers this month, and many of them do not live close-by. The benefits of the internet is that I can have customers all over the US and easily keep in touch. I realized that some may not know how to open the Stampin' Up! ink pads, so felt it was important to have a video that would explain how you open and close them. REMEMBER: Store your ink pads flat (main labeling facing up). Do not store on end or on the side as it can cause the pads to leak. When they are stored flat, the ink flows to the top of the pad so that it stays moist.

If you are reading this via e-mail, click on the subject above to access the video on my blog.


Thank you for watching/following my blog.

Mary Director
http://marydirector.stampinup.net
Stampin' Up! -- Discover Your Creativity
(On-line ordering now available thru my website)

Sunday, September 19, 2010

Faux Metal Look Christmas Card - 3rd post today

I got so excited about updating my blog, this posted a bit earlier than I planned. Rather than delete it I will leave here. Please realize there are 3 posts for today. So scroll down to see them all.

Isn't this gorgeous! I saw a card made with Faux Metal contact paper (yes, you read that right ... contact paper) on Sharon Field's site. She has embossed the card front with the Elegant Lines Embossing Folder.

Well, after finding the contact paper at our Lowe's I came home and had to try it. Here's the Big Shot products I used from Stampin' Up!:

Big Shot Die-Cutting Machine, item #113439
Top Note BigZ Die, item #113463
Textured Impressions Embossing Folder, Northern Flurry, item #120902

I will be doing a step-by-step tutorial very soon for this card as it will be taught at our October class that will feature two Christmas cards as our projects.

If you decide to try this card before I post my tutorial ... the Faux Metal Contact Paper is made by Duck. It is sticky on one side. Cut a piece the size you need and remove the backing. Place the Faux Metal piece on any color of card stock. Then run thru your Big Shot, cutting it into the shape/design/ or embossing pattern you want. Please do not use your paper punches to cut thru this. It is very thick and could permanently damage them. Paper punches are not made for more than a single layer of paper. However, your Big Shot cuts thru this easily.


Mary Director
http://marydirector.stampinup.net
Stampin' Up! -- Discover Your Creativity
(On-line ordering now available thru my website)

My Cake is Done !! - 2nd post today


I stayed up late last night and worked on my cake so that it would be completed today. I featured the preliminary photos of it yesterday on my blog. The links to the template for the cake slices and the tutorials on the flowers are HERE.

I used the leaves/stem from the Two-step bird punch and the 2 3/8" Scallop Circle Extra-Large Paper Punch from Stampin' Up!. The scallop circle was a perfect fit when folded in half do cover the top and side of the cake. It was the same size in width as the cake slice.

2 3/8" Scallop Circle Extra-Large Paper Punch, item #118874
Two-Step Bird Extra Large Paper Punch, item #117191

Doesn't it look good enough to eat!!!

Mary Director
http://marydirector.stampinup.net
Stampin' Up! -- Discover Your Creativity
(On-line ordering now available thru my website)

Karen Worrell - Featured Stampin' Up! Demonstrator

Today I am featuring Karen Worrell's beautiful card on my blog. Karen is in New York and is part of my Stampin' Up! Team. Our team does a card swap each month and this was Karen's swap for us. I think it is gorgeous, don't you!


Stampin' Up! Products she used:
Whisper White Card Stock, item #100730
Always Artichoke Card Stock, item #105119
Pumpkin Pie Card Stock, item #15117
Always Artichoke Stampin' Write, item #105113
Pumpkin Pie Classic Ink Pad, item #105216
Upsy Daisy Stamp Set, item #111710
Fabulous Phrase Stamp Set, item #120501

Great card Karen, thank you for participating in the card swap this month.

If you would need any of the products listed above to make this card, you may order 24/7 at my Stampin' Up! website by clicking HERE then click on Shop Now.

Have you ever thought of becoming a Stampin' Up! Demonstrator? Would you like more information? E-mail me (link at top of screen) and I will be more than happy to answer your questions. It is great fun to be a Stampin' Up! Demonstrator whether just for the discount (hobby demonstrator) or to earn an income (business demonstrator). Anyone joining my team from now until October 18th will receive a beautiful craft tote ($39.95 value) from Stampin' Up! for FREE. Click on the TOTE-ALLY Awesome link on the right side to learn more.

Mary Director
http://marydirector.stampinup.net
Stampin' Up! -- Discover Your Creativity
(On-line ordering now available thru my website)

Saturday, September 18, 2010

Let Them Have Cake - No Calories

Cake with no calories, how can that be????
When it is a cake made from paper, as cute as it can be.

The other day while on Stampin' Connection (Stampin' Up! Demonstrator only website), I saw a beautiful paper cake created by Bridget Douglass. Bridget mentioned where she had obtained the template for the cake slices and I was off to search. The template makes one slice, but when you put 12 slices together it makes an approximate 9" round cake like I made below. It is 2 1/4" high.

Click here for the template. Template is from Victorine Originals
The directions are on the template for making the slice of cake. Just be sure to use a strong double sided tape (like Stampin' Up! Sticky Strip, item #104294) to hold it together.


12 slices of cake put together. The ends open ... this is a box to hold goodies or small presents.

Just testing out different looks ... I had 13 of the carnation & ruffled flowers, so decided to play a bit with them to see what different looks I could achieve.


I fully decorated one piece. The white frosting is our 2 3/8" Scallop Circle Extra-Large, item #118874. It is a perfect fit for the slices.

The Happy Birthday was cut out with 2" x 1 3/8" Oval Extra-Large Punch and layered onto the Decorative Label Extra-Large Punch.

Isn't the striped paper the perfect touch to make it looks like layers of cake and frosting. I used the In-Color Designer Series Paper Pack which is the Level One Hostess Gift, item #121028.

I'm not sure if this is the design I will do for the cake. But it is a great example and I had fun making it. Once I have completely finished the cake decoration, I will post the completed cake.

You could use the cake as a party favor, to hold birthday or anniversary gifts, and wouldn't it be perfect for a bridal shower too. If you are an Home Party Consultant of any type, this would be great to put door prize slips into the boxes for people to draw. Perfect too for the person who wants a cake, but doesn't want the calories. So many possibilities.

Stampin' Up! Card Stock:
Chocolate Chip, item #102128
Whisper White, item #100730
Old Olive, item #100702

Click HERE for Carnation Tutorial
Click HERE for Ruffled Flower Tutorial

If you would like to order any Stampin' Up! products, you may order 24/7 by clicking HERE and then click on shop now. Thank you for visiting my blog today. If you have any questions, please let me know.

Mary Director
http://marydirector.stampinup.net
Stampin' Up! -- Discover Your Creativity
(On-line ordering now available thru my website)

Friday, September 17, 2010

Tutorial: How to Recover a Spiral Notebook or Tablet

Today's tutorial will show you how to recover a spiral tablet. This technique can also be used for a spiral notebook. It would be the exact same steps .. just a larger product to work with. Stampin' Up! supplies listed towards the bottom of the blog post.


My finished spiral tablet. So many fun ideas and different color combinations to create your custom cover for you tablet or notebook.

Any size spiral notebook will work. It is the same technique for each one. Just adjust the size of the card stock cover to accommodate the one you are working on.

The tablet above is 3" x 5"


Gently tear out one piece of the tablet paper. Try to keep it intact as much as possible. It will help in the next step.


Line the tablet paper up over the piece of 3" x 5" piece of card stock. Using a pencil or Uni-Ball Signo gel pen (for darker color card stock), draw little circles/dots in the hole areas.


Use the 1/8" punch hole of the Crop-A-Dile and punch the holes out using the dots/circles you just drew as the guideline.


Use the tip your paper snips to cut into the center of each hole.


Line the card stock up with the cover. Using the bone folder push the little tabs in. They will connect right behind the spiral wire.


Open up the card stock cover, so that it is apart from the tablet's original cover. On the back of the card stock piece (this is the side that will lay against the original cover) put some strips of sticky strip. Don't put extremely close to the bottom edge/corners as those will be trimmed.

Remove sticky strip and place the two pieces together. Go slowly so that you match it all up as close as possible.


Using the paper snips, trim/round the excess card stock on the edges. Remember that the Stmpin' Up! Corner rounder is NOT meant to be used with layers. You will bend it/ruin it if used with more than one layer of card stock. I found scissors worked fine on the tablet.


Using Early Espresso Classic Ink and a sponge, sponge the edge of the card stock.


NOTE: When placing the stamp on the clear block ... do not place it in the bottom portion of the clear block, place it as far up on the clear block as possible. Otherwise the clear block hits the spiral wire and does not stamp the upper image (voice of experience ... LOL).

Open up the tablet so that the cover lays flat on the table. Stamp your image using Early Espresso Classic Ink.


Image stamped.

Take a few Jewels - Basic Rhinestones and decorate a few of your flowers. "IF" this is going to be in a purse, it probably would be better to not add in the rhinestones. On a desk or counter etc., rhinestones are fine.

I think the Crumb Cake paper brushed with the Early Espresso Classic Ink looks like leather. I'm very pleased with the results.

There are many things you can do to customize your tablets using Designer Series Paper, layering card stock, added in punched images. Let your imagination go wild. These will be great as a stocking stuffer or thank you gift.

Stampin' Up! Products Used:
Crumb Cake Card Stock, item # 120953 ... 1 piece 3" x 5" (specific to the tablet used)
Early Espresso Classic Ink, item #119670
Jewels - Basic Rhinestones (150), item #119246
Stamping Sponges, item #101610
Uni-Ball Signo Gel Pen - White, item #105021 (use to mark holes if using dark card stock)
Sticky Strip, item #104294
Paper Snips (scissors), item #103570
Crop-A-Dile, item #108362
Bone Folder, item #102300
Just Believe Stamp Set, item #116948 - Wood OR #120453 Clear Mount

Stampin' Up! products may be purchased thru my Stampin' Up! website by clicking HERE and then click on shop now. You can shop 24/7 on-line. You can order too by contacting me directly (e-mail link above).


Mary Director
http://marydirector.stampinup.net
Stampin' Up! -- Discover Your Creativity
(On-line ordering now available thru my website)

You May Also Like:

Blog Widget by LinkWithin