Subscribe via email

Enter your email address:

Delivered by FeedBurner

Monday, May 31, 2010

Monday Inspiration: Thank You Cards

Happy Monday. Hope this Monday Inspiration will inspire you to try the Rubber Stamp Kissing Technique if you haven't already AND to make some Thank You cards too.


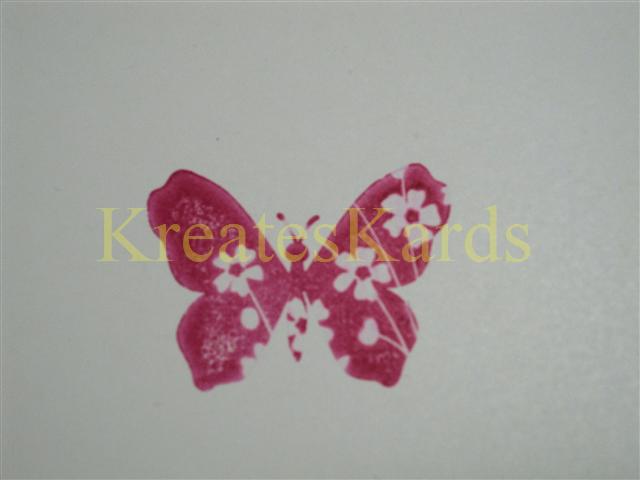
On my last blog post, I used the Rubber Stamp Kissing Technique to create the flowers and butterflies. I cut them out with scissors and use dimensionals to attach them to the cards. Both cards used the same base colors (white, melon mambo, and old olive) and the same stamp set (For All You Do, item #115360). Yet, both cards look completely different. Amazing what you can do to change a look by adding in ribbon, using a border punch, or by shadowing the design with another piece of card stock.

Remember, you can order 24/7 from my Stampin' Up! website, by clicking HERE then click on Shop Now.

Mary
http://marydirector.stampinup.net
Stampin' Up! -- Discover Your Creativity
(On-line ordering now available thru my website)

Friday, May 28, 2010

My Digital Studio Video


I've been having so much fun using My Digital Studio, I really think that it is a program you might like too. You can create cards, scrapbooks, flyers, newsletters etc. Such a versatile program. You can make an item 100% digital or do part digital with part actual card stock and embellishments. I have a number of samples of my creations here on my blog. Just click on My Digital Studio on the right hand site of this page.

The floral image above with sentiment was created using My Digital Studio and one of the new downloads called Summertime Splendor DSP, item #121067. Then I backed it with scalloped card stock and attached to a card base. This would be considered a hybrid card.

Stampin' Up! just put a new video on YouTube about MDS, so I wanted to share that with you today. If you are reading this blog entry from an e-mail message, you will need to come to my blog to view the video.


If you would like to purchase a copy of My Digital Studio, it is item #118108 and sells for $79.95. You can purchase it by contacting me directly OR by ordering it on-line thru my Stampin' Up! website by clicking HERE.

Mary
http://marydirector.stampinup.net
Stampin' Up! -- Discover Your Creativity
(On-line ordering now available thru my website)

Thursday, May 27, 2010

Rubber Stamp Kissing Technique Tutorial

I had to laugh when I heard the name of this technique. It is called the "Kissing Technique". I promise you all that this is definitely "G" rated and is truly a technique for stamping with rubber stamps.

Stampin' Up! Products Used:

For All You Do Rubber Stamp Set, set of 10, item #115360 (wood mount only)
Melon Mambo Classic Ink, item #115656

Here's what the finished product looks like. These images were stamped with "solid" image stamps. If I had stamped the flower or butterfly directly from the stamp pad to the paper, they would of been a solid image not floral as shown above. That is where the stamp kissing technique comes in.

Let's get started.

Here are the 3 stamps that I am going to work with in this tutorial.


First stamp the design stamp on your stamp pad. Be sure you get good coverage with all parts inked.


Here's how it looks after inking.


You can hold your stamps to do this part, but it was easier to photograph with the stamps set on the work surface. The floral design stamp is facing up and the flower solid stamp is set directly on top of it. Press firmly and lift straight up so that you do not smear your designs.


Look closely, see how the floral designs are now showing on the flower solid stamp.

Press the flower solid stamp firmly on your card stock.

Here's the finished flower. It truly is now one of a kind design.

Always clean your stamps well before using again. You do not want one design to impact the other, so starting with a clean stamp is important.

I used the same floral design stamp with my butterfly solid stamp. Again, you can see the flowers on the wings.


Here's the finished butterfly design.


In the stamp set called For All You Do, you also have polka dots to use as your design stamp. Then the other stamps in the set include 2 sentiments, 2 other flowers, a stem with leaves along with the stamps I showed you above.

This technique can be done with any stamp that has a design to it and then pair it with a solid image stamp. The combinations you can create are without limit. You are going to have so much fun with this.

These can be stamped directly on a card or stamped and cut out with scissors. If you have our Stampin' Up! Idea Book & Catalog for 2009-2010, look on page 118 to see the wonderful shadow box they made with the butterflies.

If you would like to order this stamp set and other Stampin' Up! supplies, remember that you can order 24/7 from my Stampin' Up! Website by clicking HERE then click on Shop Now.


Mary
http://marydirector.stampinup.net
Stampin' Up! -- Discover Your Creativity
(On-line ordering now available thru my website)

Monday, May 24, 2010

Monday Inspiration: Congratulations Graduate


Graduation is just around the corner for so many. I thought it would be fun to show you a graduation card I created using My Digital Studio from Stampin' Up!, item #118108.

Stampin' Up! Digital Downloads:
Summertime Splendor DSP, item #121067
Go Graduate Plus Stampbrush Set, item #121069

I'm so pleased withe the Summertime Splendor DSP download. The colors and the flowers are beautiful. I know that I will be using it a great deal. Below is a sample of what the DSP has in the way of designs/patterns.

You could achieve a similar effect by using your favorite Stampin' Up! DSP (designer series paper) and the Go Graduate Stamp Set, item #118529 (wood mount) or item #120054 (clear mount). This set is on Page 24 of the Summer Mini Catalog.

What a great way to start out the week. Hope you have a very creative week.


Mary
http://marydirector.stampinup.net
Stampin' Up! -- Discover Your Creativity
(On-line ordering now available thru my website)

Friday, May 21, 2010

Gable Box Tutorial

I was so excited the other day to make my very first Gable Box. I was surprised at how easy it was to make and thrilled too that it only took my sheet of 8 1/2" x 11" paper. They are the perfect size for a small gift or party favor. Wouldn't they be beautiful as wedding favors with one at each place setting at a wedding reception or big event.

Stampin' Up! products used:
Card stock of your choice ... 1 piece 8 1/2" x 11"
(I used Bermuda Bay, item #115317)
Paper Snips (scissors), item #103579 (these are the BEST scissors I've ever used)
Sticky Strip, item #104294
Pocket Silhouette Stamp Set, item #111672
Bermuda Bay Classic Ink, item #115655
Crop-A-Dile, item #108362
1/4" Grosgrain Ribbon, Whisper White, item #109025
Wide Oval Paper Punch, item #112082


I have taken a Stampin' Write marker and drawn in the score lines so that it makes it much easier for you to see them in the photos. You do not need to mark in the lines on your project.

On the 11" side, score at: 1/2", 3 1/2", 5 3/4", and 8 3/4".

On the 8 1/2" side, score at: 3" and 6 1/2"


On the front side of the card stock, stamp in your image(s). I used one of the designs from the Stamp set called Pocket Silhouettes and used Bermuda Bay Classic ink on the Bermuda Bay card stock for a tone on tone image. You would achieve a similar look using versamark with this card stock color.

You will now cut out the two 1/2" wide corner pieces .... see the small xxx on the card stock above ... that is the area you will be cutting off.

Now crisply fold all the score lines using your bone folder.

I took a Stampin' Write Classic Black marker to show the lines you will cut. You only cut up to the crease line. Be sure to only cut the ones shown above in black.

If you look at your card stock, you will notice that there are 4 short and 4 longer rectangles. The shorter ones are for the bottom of the box, the longer ones are for the top.

With the 1/2" piece to your left with the stamped side down ... punch out the wide oveal on the 1st and 3rd longer rectangle as shown above.


Photo shows you the stamped side after the ovals were punched.

Turn your paper over, stamped side down. Use Sticky Strip and place it as shown in the photo above. NOTE: The piece on the 1/2" section actually goes on the stamped side. This is the only section that the sticky strip is placed on the stamped side.

Sticky strip placement on the 1/2" piece.


Removed the protective film from the sticky strip and carefully attach it to create your sides to the Gable Box. Press together. This seam will not be towards the back of the box as you finish the rest of the steps.

This is the bottom of the box. Fold over the two pieces with no sticky strip on them. Then remove the protective film from one of the sides and fold down to attach. Do the same with the remaining side on the bottom. the bottom of the box is now complete.

Here's your box with the bottom complete. You now will remove the protective film on the top piece and fold it over INTO the box to act as a support for the box itself. Do this on both sides with sticky strip on them.

This is a photo of the top piece folded down into the side of the box.


Match up your top pieces/ovals. While holding them together, punch two 3/16" holes above the oval. These holes will act as guides for your 1/4" grosgrain ribbon. Thread your ribbon thru the back of the box, even out the ends as they come forward. Tie the ribbon in a square knot and trim.

Square knot tip:
Right over left and under.
Pull ribbon so that one end is facing up, the other down.
Left (top piece) over right (bottom piece) and pull thru to the sides.
It will make a very nice bow that will lay pretty flat.

Mary
http://marydirector.stampinup.net
Stampin' Up! -- Discover Your Creativity
(On-line ordering now available thru my website)

You May Also Like:

Blog Widget by LinkWithin