The two-step stamp set we are using today is called Greenhouse Garden. It is currently 20% off from April 1 thru April 30, 2010. It is item #113824 and is on Page 94 of the main catalog and is only available in wood mount.
 This is the completed page of flowers using the two-step method of stamping with Greenhouse Garden Stamp set.
  For perfect placement of the stamps, you will need a Stamp-a-ma-jig. It is item #101049 and is on Pg 191 of the main catalog. It comes with the black handle (for placement) which has a non-skid base to it. Also comes with a reusable, wipe-clean imaging sheet for easy placement. I clean the imaging sheet with Stampin' Mist and a soft cloth.
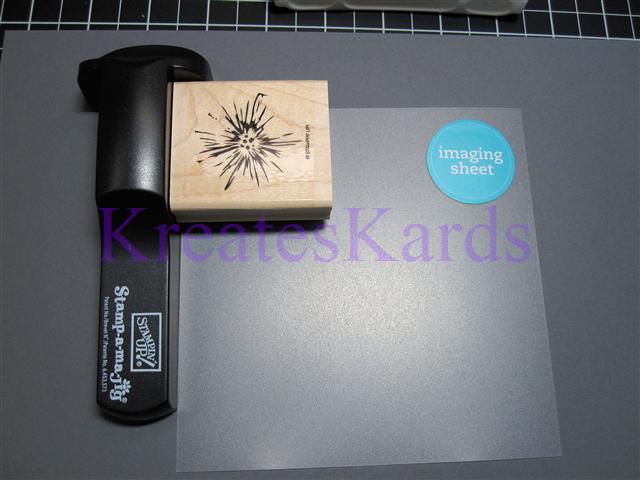 Using the corner, line your Stamp-a-ma-jig in the left upper corner of the imaging sheet. Then stamp your image onto the imaging sheet, being sure to line the stamp up with the indentation of the Stamp-a-ma-jig.
 When you removed the stamp, lift straight up. The image is now on your imaging sheet. I used Classic Ink. Do not use StazOn as it is a permanent ink.
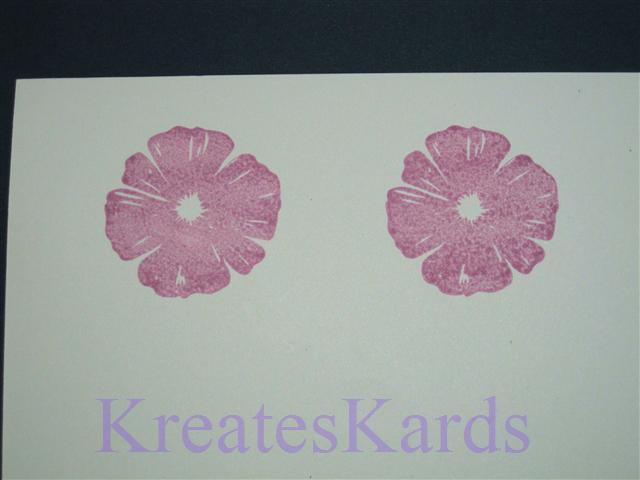 I stamped two of the pansy style flowers and will walk you thru the process step by step.
 Put the stamped image over the pansy style flower. Set it exactly where you want it placed. Shows you how it will look when stamped the 2nd time.
  Line the Stamp-a-ma-jig with the upper left corner. Once in place, then remove the imaging sheet.
 Altho not shown in this photo, I do keep my left hand on the Stamp-a-ma-jig to keep it in place during this process. Now line up your inked stamp with the Stamp-a-ma-jig and press straight down, and then remove the stamp by coming straight back up.
 Finished pansy style flower. The one on the right is ready to be stamped now too. Doesn't the accent stamp make a HUGE difference in the look of the flower.
 Photo above shows the two pansy style flowers completed plus I have stamped the other 3 flowers from the stamp set on the paper too. There is a violet, daisy, and a lily .
 I took the centers of each flower and stamped them on each corner of the imaging sheet. That way they were ready for immediate use. At the end of the project, I cleaned it with Stampin' Mist (item #102394) and a soft cloth.
 Here's the finish project. The flowers could easily be cut out and attached to a card. They could be stamped directly onto card stock or a card base. So many options and the color combinations are endless. Just remember to make your first stamped image the lighter color so that the accent stamp will show up better too.
Hope you enjoyed the tutorial. If you need any Stampin' Up! products contact me directly OR place an order on-line 24/7 by clicking HERE.
Mary
http://marydirector.stampinup.net/
Stampin' Up! -- Discover Your Creativity
(On-line ordering now available thru my website)
3 comments:
Wow... those are great... I am restraining myself for now, but it may not last long. Thanks for those wonderful directions!
Thank you very much for sharing with
us this wonderful idea! It looks great!!
Yours
Marion
Hi Mary,
Beautiful step by step tutorial.
Would you accept the award over at my blog?
Post a Comment