My finished flower.
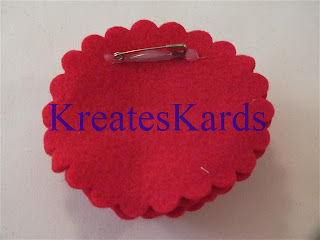
If I was making this again, I would have the pin facing the opposite direction. This way was a bit more awkward for me to pin myself.
Added the flower pin to my shirt. Pleased with the results.
The other day I showed you a step by step tutorial on how to make a Scalloped Circle Felt Wreath using the Big Shot Die Cutting Machine and the Scallop Circle #2 Die. I had some of the felt scalloped circles left over so decided to make a flower pin.
Here's what I did:
Cut out two of the large Scallop Circles.
Cut out 12 to 15 of the small Scallop Circles.
Take one of the large Scallop Circles and use it as your base.
a. Fold the small Scallop Circles one at a time (just like on the wreath) and then hand sew to the base.
b. Continue doing this until you have full flower. I did sew each petal a couple of times to the base to make them more secure.
c. Using a hot glue gun, put glue on the back side of the flower then immediately put the other large Scallop Circle on top lining the scallops up.
d. Open a safety pin, and glue it to the back. Allow to dry.
Pin can be used on a blouse, a purse, a headband or even as a gift topper. 1/4 of a yard of felt should be more than enough to make a number of finished flowers. I used scraps of felt that I had so didn't measure out what I used. If you use cotton fabric, you will need at least double to triple the amount of flowers. The felt is much denser than cotton.
You may order from my Stampin' Up! website 24/7 by CLICKING HERE, then click on Shop Now or by contacting me directly. My e-mail link is at the top of the screen.
Mary Director
Stampin' Up! Senior Supervisor, Independent Demonstrator & Creative Coach
http://marydirector.stampinup.net
Stampin' Up! -- Discover Your Creativity
(On-line ordering now available thru my website)


No comments:
Post a Comment