Subscribe via email

Enter your email address:

Delivered by FeedBurner

Sunday, August 15, 2010

Sneak Peek -Textured Impressions Embossing Folder Northern Flurry

Here's another great Textured Impressions Embossing Folder that will premiere in the Holiday Mini Catalog on the 1st of September. It is used with the Big Shot Die Cutting Machine, item #113439.

Northern Flurry, item #120902 ... $7.95

This will definitely accent a whimsical or elegant holiday card. I used Whisper White Card Stock for this one and then lightly sponged over it with Bashful Blue Classic Ink to give it a bit more depth for the photo. I think this is going to be one of my favorites to use, especially for Christmas cards. Think I better start planning my cards now and this will be a great accent piece for the cards.

Mary
http://marydirector.stampinup.net
Stampin' Up! -- Discover Your Creativity
(On-line ordering now available thru my website)

Saturday, August 14, 2010

Sneak Peek -Textured Impressions Embossing Folder Spider Web

In the new Holiday Mini Catalog that premieres on the 1st of September, there is a brand new Textured Impressions Embossing Folder called Spider Web. I have used it here with Whisper White Card Stock and then sponged it lightly with Basic Black Classic Ink. Think it will be perfect for Halloween cards. The Textured Impressions Embossing Folders are used in the Big Shot Die Cutting Machine, item #113439.

Spider Web Textured Impressions Embossing Folder, item #120889 ... $7.95
(not available until 1 September)

When you received your Holiday Mini Catalog later this month, look on Pg 6. Stampin' Up! put black napkins thru the Big Shot using this folder and they look amazing!!! Wouldn't you love to do that for a Halloween party.

If you do not already have a demonstrator and would like to receive a copy of the Holiday Mini Catalog, please e-mail me your name, address, zip and e-mail address and I will mail you a copy of this catalog later this month. I would love to add you to my list of happy customers. If you are looking too for way to earn some extra money and receive a discount on Stampin' Up! products, let me know too and I will send you information about becoming a demonstrator. I'm looking for individuals who love crafting as much as I do to add to my team. My e-mail link is in the header of this blog. Hope to hear from you soon.

Stampin' Up! products are available 24/7 thru my website by clicking HERE then clicking on shop now.

Mary
http://marydirector.stampinup.net
Stampin' Up! -- Discover Your Creativity
(On-line ordering now available thru my website)

Friday, August 13, 2010

Friday the 13th - Good Luck Ladybugs Mini Tutorial

Since it is Friday the 13th, I thought it was appropriate to send everyone a bit of good luck and wishes for a wonderful day.

Aren't these little ladybugs the cutest ever! You won't believe how easy they are to make too. Did you notice the new Decorative Label Punch (item #120907 - available 1 Sep) in black and layered underneath our Designer Label Punch, item #119862. Using the Uni-Ball Signo Gel Pen, item #105021, I printed the Good Luck.

The ladybugs are made with just circles and the antennas are hand drawn in using a Stampin' Write Marker.

Mini Tutorial:

1. Punch out the head of the ladybug with a small circle punch using Basic Black Card Stock. Using SNAIL adhesive attach to your card.

2. Punch 2 larger circles for the body and the wings. Basic Black Card Stock for body, Real Red for the wings.

3. Glue body over edge of the head circle.

4. Cut wing circle in half, then position over the body leaving a bit of an opening.

5. Using a round eraser head (like on the end of the pencil), dip the eraser into Classic Black ink then daub on the ladybug's wings. Makes perfect spots for them.

6. Using a Stampin' Write Marker in Basic Black, draw in the antennas.

Punches Used:

Large Ladybug:
1 3/4" Circle, item #119850
1 " Circle, item #119868

Medium Ladybug:
1 3/8" Circle, item #119863
3/4" Circle, item #119873

Small Ladybug:
1 1/4" Circle, item #119861
1/2" Circle, item #119869

The embossed backdrop was made using Manhattan Flower Textured Impressions Embossing Folder, item #114517. This folder is an exclusive design to Stampin' Up! and perfect for use with our little ladybugs.

Mary
http://marydirector.stampinup.net
Stampin' Up! -- Discover Your Creativity
(On-line ordering now available thru my website)

Thursday, August 12, 2010

Sneak Peek - New Paper Punches in Holiday Mini Catalot


New Paper Punches: (from left to right)
2 1/2" Circle, item #120906
Decorative Label, item #120907
3/4" x 15/16" Oval, item #120908
(These will all be available as of 1 September)

These are going to be great for layering, accenting, and creating Punch Art.

My friends all know that I LOVE paper punches and my Big Shot Die Cut Machine. So when the new Holiday Mini Catalog arrived at my door, I knew the minute I opened it there was so many new things I wanted and NEEDED. There are wonderful stamp sets for Christmas, Halloween, and the fall. We even have Designer Fabric that comes with an idea sheet The fabric is called a Fat Quarter --- 3 styles per pack, each fat quarter piece is 28" x 18". (photos soon ... I haven't opened them yet.). There are new embellishments like Designer Buttons, Glass Glitter, and Glimmer Brads that actually sparkle and made our 4 core color collections.

You may start ordering from the Holiday Mini Catalog as of 1 September 2010.

The Holiday Mini Catalog will be arriving at your doorstep by the end of the month "if" you are one of my customers. If you do NOT already have a demonstrator and live in the US, please e-mail me (link at top of the page) your name, address and zip along with your e-mail address and I will send a Holiday Mini Catalog out to you.

Mary
http://marydirector.stampinup.net
Stampin' Up! -- Discover Your Creativity
(On-line ordering now available thru my website)

Wednesday, August 11, 2010

Secret Fold Card Tutorial

The long awaited Secret Fold Card Tutorial ....... I received so many positive comments about this card, I just had to do a step-by-step tutorial. I will be teaching it at my Stampin' Up! class on the 14th also. There is also more information about it on my blog HERE

This card will fit into an A2 size envelope. I made these as birthday cards, but you could use them for any occasion just by switching out the designs.


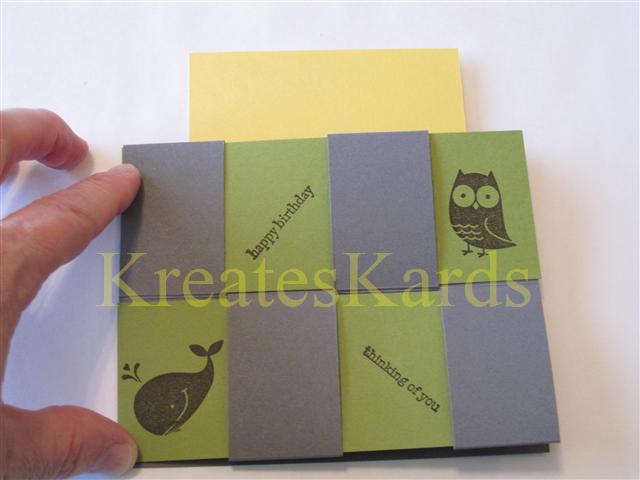
Here's the card we are going to make, it is called a Secret Fold Card because there is truly a secret area in it that can be opened if you fold the card properly. It has been created using Stampin' Up! supplies:

Stampin' Up! Supplies Used:
Early Espresso Classic Ink, item #119670
Basic Gray Card Stock, item #121044 .... 1 piece 5" x 8", 1 piece 3" x 2"
Daffodil Delight Card Stock, item #119683 ... 1 piece 3 1/2" x 2 1/2"
Old Olive Card Stock, item #100702 ... 1 piece 1 7/8" x 5 ", 1 piece 2 1/2" x 1 1/2", and one scrap for a medium oval punched out twice.
Medium Oval Punch (sneak peek) .. 3/4"x 15/16" oval punch will be available September 1st.
Fox & Friends Stamp Set, item #117020 - wood OR item #118565 clear mount.
Teeny Tiny Wishes, item #115370 - wood only
Designer Buttons, Brights, item #119747 (optional)
Multipurpose Liquid Glue, item #110755 (if you use the button on the card)
SNAIL Adhesive, item #104332
Bone Folder, item #102300
Paper Cutter, item #104152 .....Blade Refill, item #104153 .... Cutting & Scoring Blade Refill, item #104154

Directions:

Score the large piece of Basic Gray Card Stock at 2", 4" and 6"


Put the card stock into the paper cuter so that the score lines are going left to right.
Position your blade at the top score line cutting to the lower score line (hope you can see in the photo).
Cut at 1 1/4", 2 1/2", and 3 3/4" (be sure it cuts from the 2" score line down to the 6" score line).
Using the bone folder, fold and crease the fold lines. I put them upper and lower to show you the cuts more clearly.
Weave one of the pieces of Old Olive Card stock (1 7/8" x 5") thru the card slots.


Now take the other piece of 1 7/8" x 5" Old Olive Card Stock and weave it the opposite way.
The first piece started on the top.
The second piece started underneath.
This is KEY to making the secret fold work.

This is the completed weave. Each row is the opposite of the other.


Using SNAIL Adhesive, layer the Old Olive (2 1/2" x 1 1/2") onto the Basic Gray (3" x 2"), then layer that onto the Daffodil Delight (3 1/2" x 2 1/2").


Using SNAIL Adhesive only on the upper third of this, attach to the card base.
Center left to right and top to bottom as you place it.


Punch out two small ovals. Using SNAIL Adhesive glue them together to form a button. Now add adhesive to the bottom half of the button you just made.
Hold down the card flap, the position the button so that the card flap can go underneath but not be glued to the button.

(NOTE: If you use a real button for this step, use liquid multipurpose glue and only glue the bottom half of the button ... let completely dry before sliding card flap under the edge).

Stamp your front image.
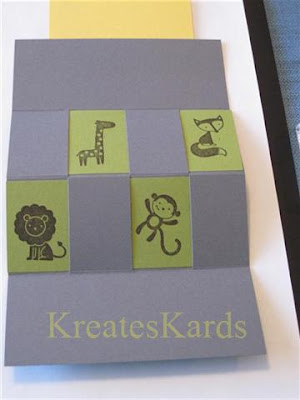
Stamp the first set of interior images. Be careful to stay on the Old Olive Card Stock when stamping.

Fold the card in the center and then separate the secret fold.


Now stamp your Secret Fold images.

Here are 3 that I made tonight.

ON-LINE ORDERING for Stampin' Up! Products 24/7


Mary
http://marydirector.stampinup.net
Stampin' Up! -- Discover Your Creativity
(On-line ordering now available thru my website)

You May Also Like:

Blog Widget by LinkWithin